VM Install On Windows
Introduction
In this course you will use a Unix environment. Specifically, you should use the latest LTS release of Ubuntu to ensure you are running the same system as the instructor. If you are using Windows, follow the instructions provided below to install Virtual Box and an Ubuntu virtual machine.
Downloads
Download and Install Oracle VM Virtual Box for your machine from the virtual box download page.
Download the Linux Ubuntu ISO (drive image) from https://www.ubuntu.com/download/desktop
Creating the Virtual Machine
Open VirtualBox
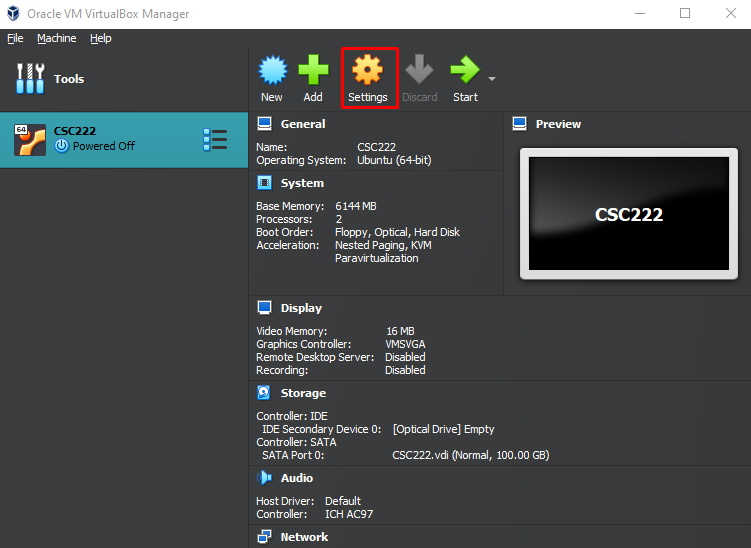
Create a new VM with the following parameters and then click next.
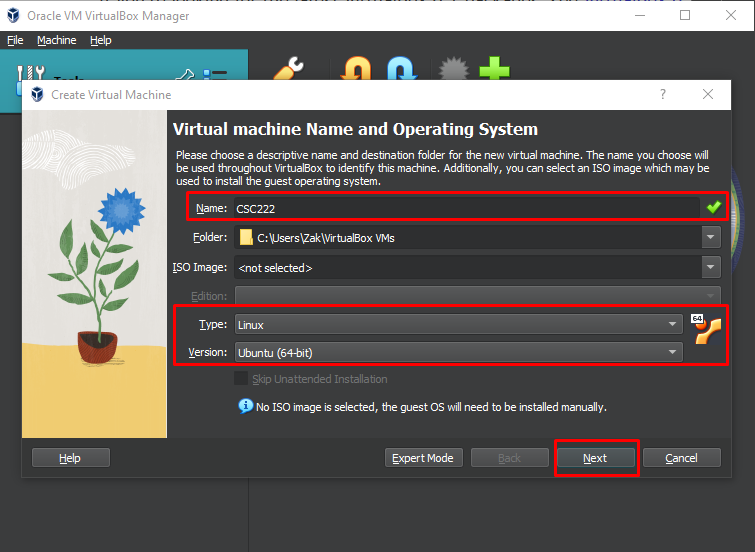
    Name: CSC222
    Type: Linux
    Version: Ubuntu (64-bit)
    # If you can’t find 64-bit in the list of options, enable hardware virtualization.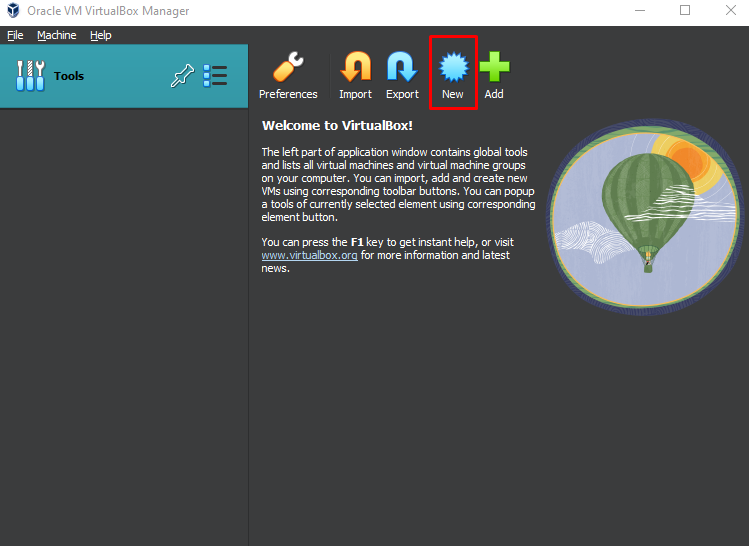
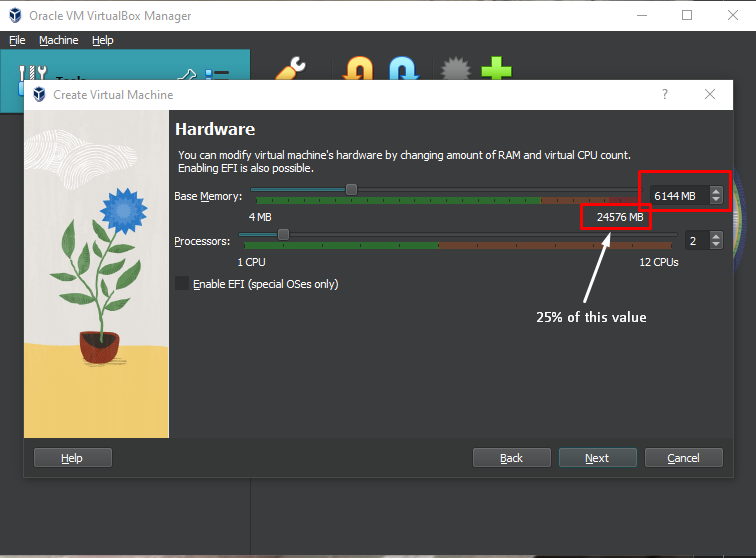
- Base Memory: Give the VM about 25% of your system’s RAM. For example, if your computer has 4 GB of RAM, then give the virtual maching 1024 MB (1 GB). If your computer has 8 GB of RAM, then go with 2096 MB (2GB) for the virtual machine. For 16 GB on your computer, set 4192 MB (4 GB) of RAM to the VM. After setting the RAM, click next.
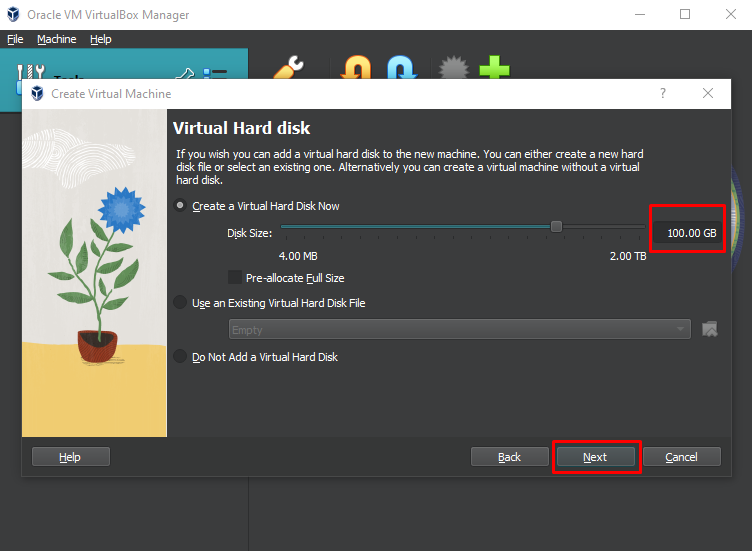
- Virtual Hard Drive (VDI): If you have 100 GB to spare on your computer, give it 100 GB. Do not pre-allocate the full size. Leave it as dynamically allocated so that it only uses up as much space as it needs. Then click next and Finish.
Editing the VM
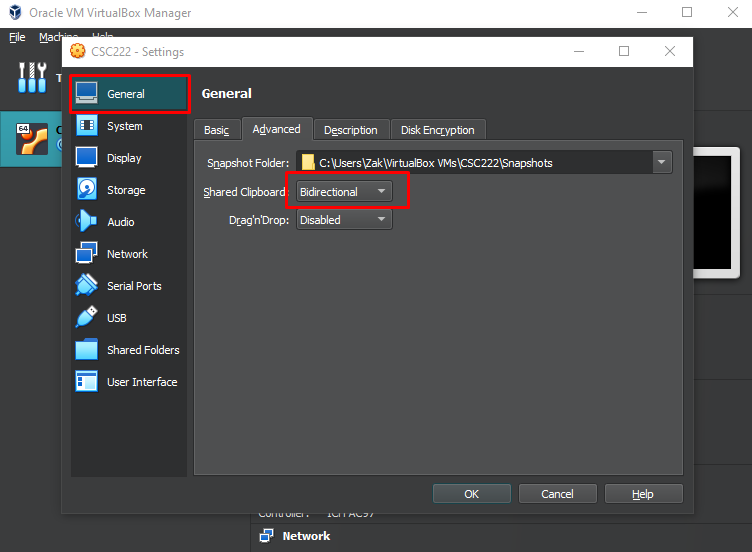
- Select the VM and click settings.
- Navigate to
General > Advancedand set Shared Clipboard to Bidirectional.
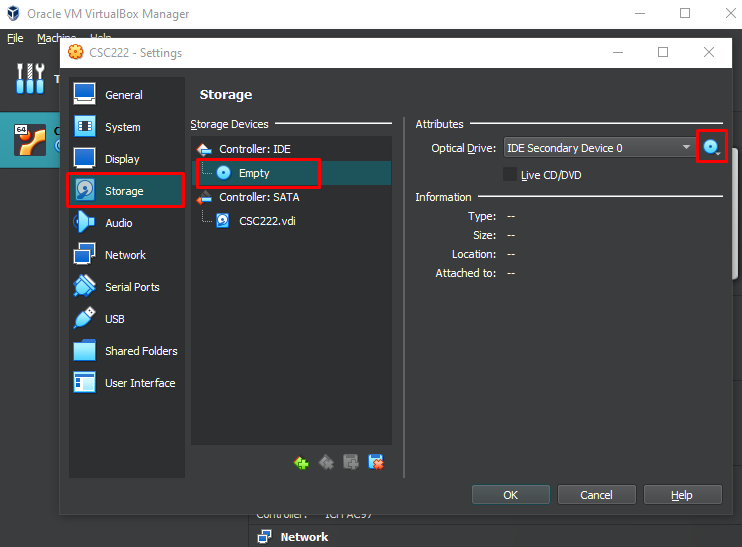
Navigate to
Storageon the left hand side and select💿 EmptyunderStorage Devices > Controller : IDEOn the right hand side of the window, click the disk icon
💿to choose a virtual CD/DVD disk file. Find the Linux Ubunut ISO that you downloaded earlier.
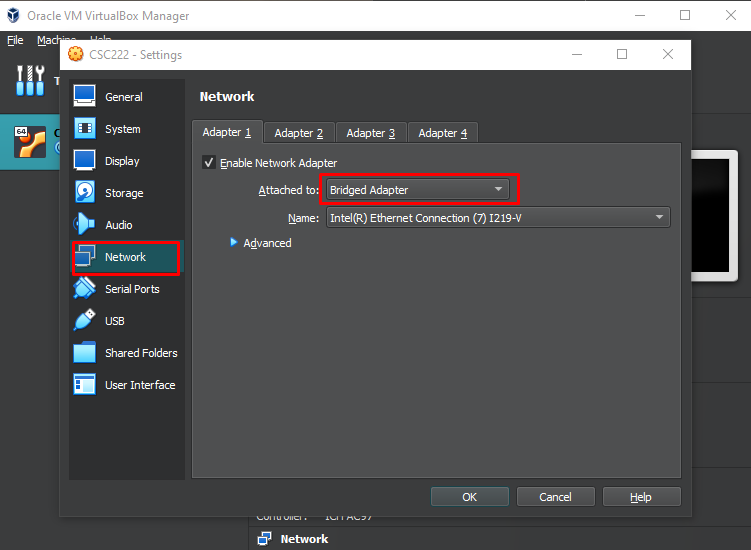
- Navigate to
Network > Adapter 1. SetAttached TotoBridged Adapterand select the proper network adapter to “connect” the virtual adapter.
- Now click
Ok.
Starting the VM
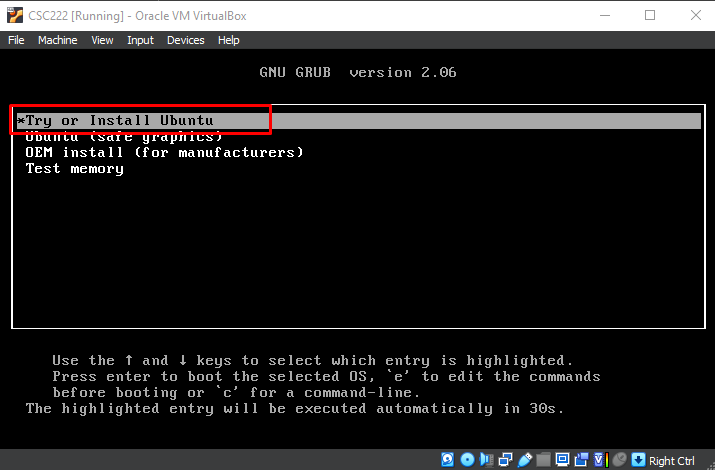
- Start the VM and select
Try or Install Ubuntu.
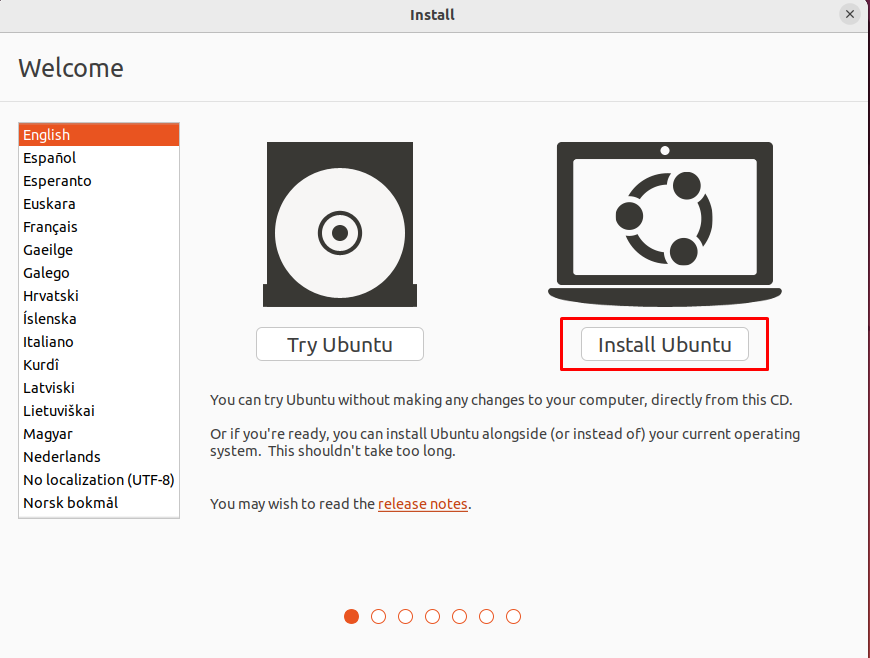
- Once the Ubuntu ISO has booted, click the
Install Ubuntuicon.
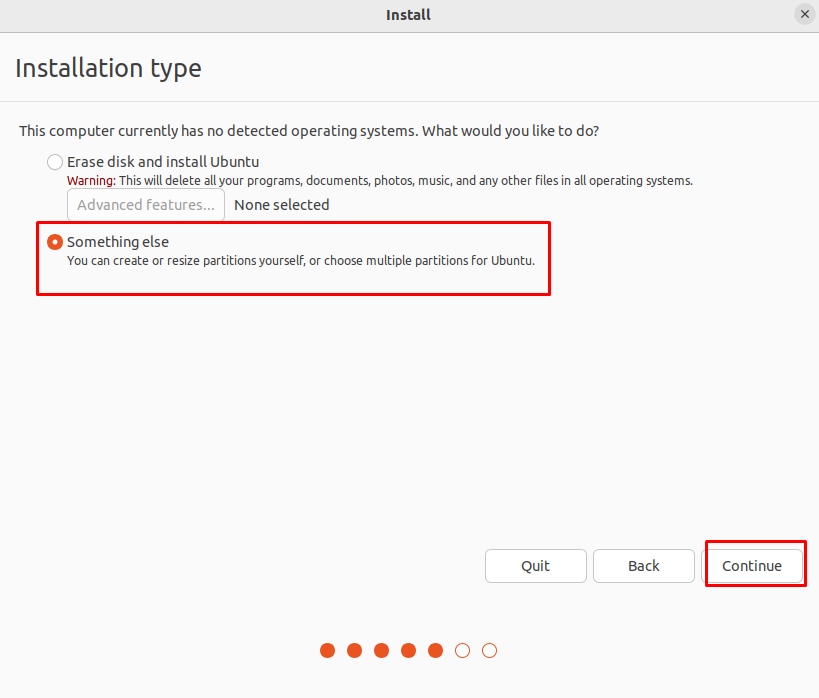
- When prompted for the
Installation Type, selectSomething Elseand then continue.
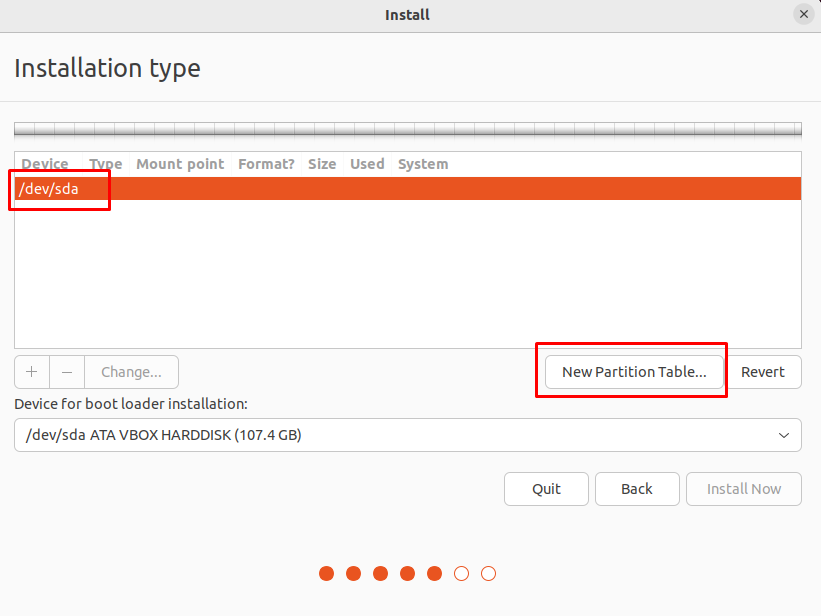
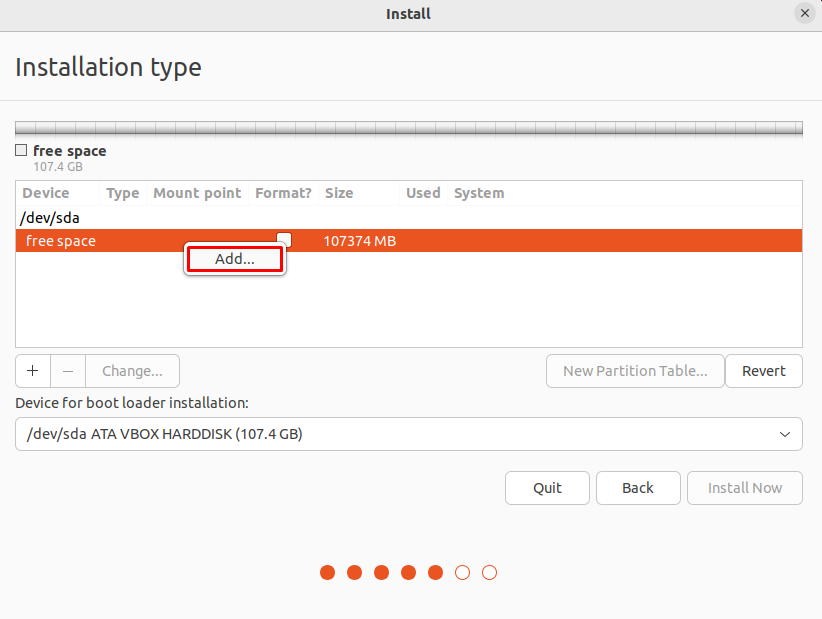
- Your hard drive should be referred to as something like /dev/sda. Select
New Partition Table. A line withfree spaceshould appear.
Partitioning the Drive
- Now we will add 4 partitions for
/boot,swap,/, and/hometo the free space. This setup will result in wiping/boot,/, and swap when updating the OS but/homewill not be touched resulting in faster updates (~30 minutes).
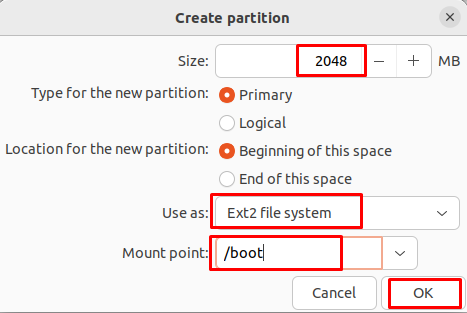
The partition for
/bootstores the Linux kernel images. Set the following parameters.size 2048 MB type primary location beginning use as ext2 mount point /boot
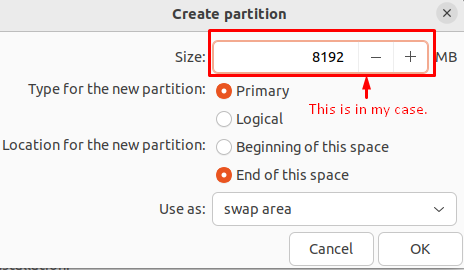
The partition for the
swaparea is for memory swap space and hibernation.size if RAM size >= 4 GB, size = RAM size. otherwise, size = 2x RAM size but no more than 8 GB. Ex: 2 GB RAM: 4 GB swap 4 GB RAM: 4 GB swap type primary location end use as swap area
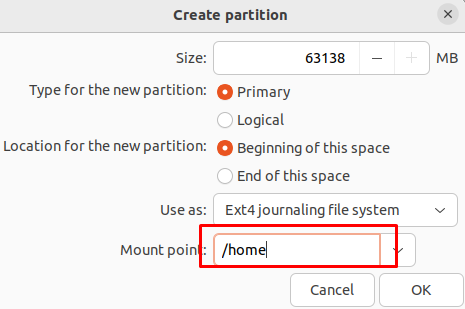
The values in the following image may not match your values
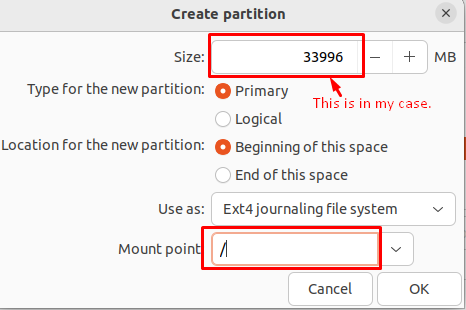
The partition for
/stores the OS, OS configuration files, and applications.size ~35% of space left type primary location beginning use as ext4 mount point /
The partition for
/homestores your files (application configuration, settings, pictures, etc)size ~65% (the last portion of free space) type primary location beginning use as ext4 mount point /home
- Click
Install Nowafter creating the partitions.
Final Setup
Set the timezone to the Chicago timezone (for Central).
Set the user.
Example:
    name: zak
    computer name: zak-csc222
    username: zak
    password: something fairly strong that you will remember

    require my password to log in
    don't encrypt my home folder
After this it will start installing/copying files.
Reboot into Linux!
Go to the Additional Steps.